Welcome to Microsoft Office 101! Every week Workforce Training will be publishing an article with a different tip or two pertaining to one of the Microsoft Office programs.
This week our focus will be on how to mail merge in Microsoft Word. Let’s get started!
Mail merges are used to produce multiple letters, labels, envelopes, name tags, etc. using information stored in a list, database, or spreadsheet. Every item is the same, but one part of each item is changed.
For example, you might have one hundred customers that you need to send a promotional letter to, but you want each letter to personally address the recipient. This is where a mail merge comes in.
How to create a mail merge
Step 1: On the “mailings” tab, click “start mail merge” and select “step by step mail merge wizard” from menu.
Step 2: Choose the type of document you want to make, then “next”
Step 3: Select “Use the current document,” then “next”
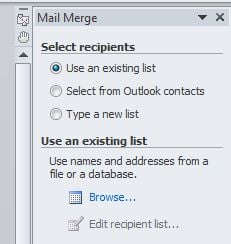
Step 4: Under “Select Recipients,” choose “use and existing list,” then “browse”
Step 5: Locate the file you want to merge and select “open,” then “next”
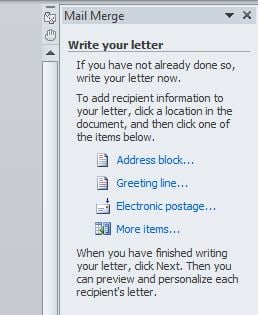
Step 6: Write your letter, then choose a placeholder. Options are “Address block,” “Greeting line,” “Electronic postage,” or “More items.” Placeholder will appear in the document.
Step 7: Click “Next: Preview your letters”
Step 8: Preview the letters (name tags, envelopes, labels, etc.) to make sure the info from the recipient lists appears correctly in the letter.
Step 9: Click “Next: Complete the merge,” then “Print”
That’s it! Now you know how to make labels in Word and can create personalized letters and name tags, or pre-addressed envelopes in no time at all. Tune in next week for our next lesson in Microsoft Office 101.

.png?width=220&name=Do%20You%20Pocatello%20Podcast_%20(1).png)


